
Essential Materials for DIY Christmas Ribbon Bows
Choosing the Right Ribbon: Types and Textures
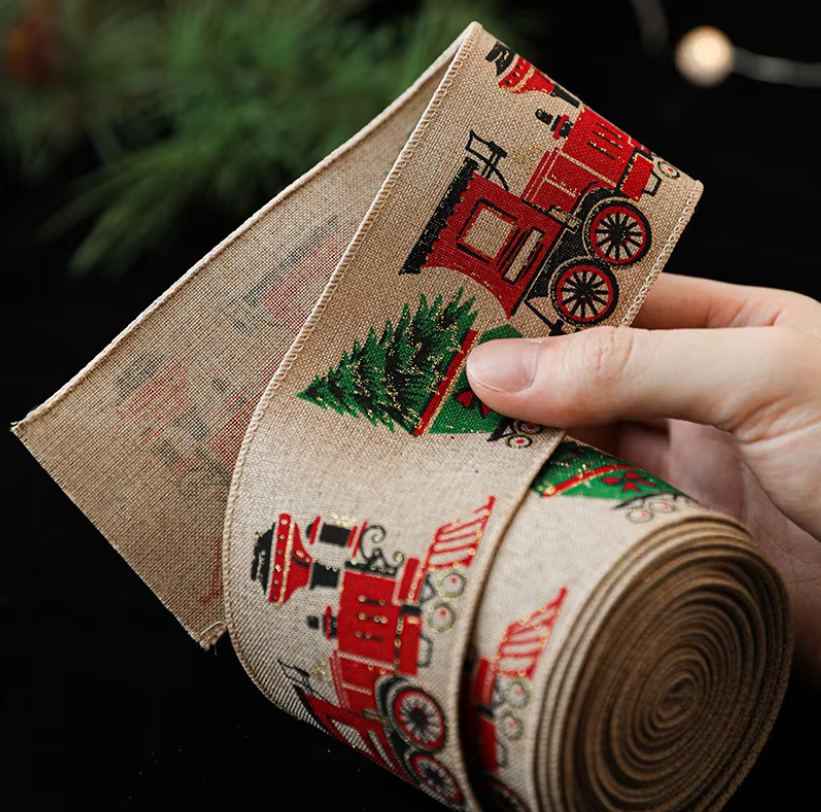
Picking out the right ribbon makes all the difference when making those DIY Christmas bows. The market offers several options for bow makers: satin, grosgrain, and organza come to mind most often. Satin gives that classic smooth look everyone loves at Christmastime. Grosgrain has those little ridges running along it which actually helps create dimension in the finished product. Organza is super light and see through, great for something more delicate looking on gifts or tree ornaments. Ribbon width matters too - thicker ribbons will naturally make bigger, fluffier bows. Texture plays into how the whole thing looks once tied together. Want to really capture the holiday vibe? Go traditional with red and gold combinations or try green paired with silver accents. These color choices just scream Christmas and make decorations pop without going overboard.
Optional Embellishments for Extra Festivity
Want to give those Christmas ribbon bows an extra special touch? Try throwing in some fun embellishments! Beads, little pine cones, maybe even some fake berries work great for transforming basic bows into something really eye catching. Getting them attached takes different approaches though. Just thread beads right onto the ribbon or glue them on if needed. For pine cones and berries, floral wire tends to hold better than regular glue most of the time. Don't forget about seasonal colors either. Sparkly snowflakes or shiny ornaments from the craft store add real visual interest. These additions bring depth and character to the bows while helping everything match up nicely with other holiday decor around the house. The whole effect makes handmade gifts look so much more festive when they hit the gift wrapping table.
Step-by-Step Guide to Crafting Classic Ribbon Bows
Measuring and Cutting Ribbon Like a Pro
Getting good at making those classic ribbon bows really comes down to knowing how to measure and cut properly. First thing first figure out what size bow works best for what needs doing. Most folks go with about 18 inches per loop, so if making a regular four loop bow, expect to use around 72 inches total. Got to have the right stuff handy too. Sharp scissors are a must for clean cuts, though some people swear by using a little sealant on the ends to stop them from fraying. Speaking from experience, having everything ready beforehand makes life so much easier. Cut all the ribbons needed for several bows at once before diving into actual crafting. Saves loads of time come December madness when everyone needs dozens of bows for presents and decorations alike.
Looping Techniques for Flawless Symmetry
Getting those loops just right makes all the difference when creating a symmetrical bow that really catches the eye. Most people start with the traditional loop method where they fold the ribbon back and forth until it resembles something like a bow tie shape. Want something fancier? Give layered loops a shot. Just stack them one on top of another to create more depth and dimension. Keep things balanced though since symmetry matters a lot here. Make sure every loop matches in size otherwise everything starts looking off kilter. Struggling with mismatched loops? A little extra tension on the ribbon or tweaking how much fabric overlaps usually fixes the issue. Fixing these small problems goes a long way toward making bows look like they came from a professional gift wrapping service rather than someone's living room table.
Securing and Fluffing Your Bow for Maximum Impact
When those loops look just right, it's time to secure everything so the bow keeps its nice shape. Grab some strong wire or maybe a thick ribbon and wrap it around the middle pretty tight. This helps hold everything together without slipping apart later. Now comes the fun part - fluffing! Take each loop and gently tug them outwards until they spread out nicely. The goal here is to get them looking as full as possible while still keeping things balanced. A well-fluffed bow really stands out at holiday time or special events. Spend a few extra minutes getting this right, because those little details make all the difference when trying to create something truly festive for guests or gifts.
Creative Variations for Festive Bow Designs
Layered Bows: Adding Depth with Multiple Ribbons
Adding layered bows gives decorations extra depth and that special festive flair we all love. When several ribbons are stacked together, it creates something really elegant looking that stands out on presents or holiday displays. Start experimenting with different fabric types maybe? Satin works great alongside organza, while velvet pairs nicely with lace for interesting contrasts. Colors matter too obviously. Go for colors that go well together or throw in some bold opposites if that's what catches the eye. These kinds of bows really stand out on wrapped gifts and especially around Christmas wreaths where they become the main attraction. Picture those rich red velvet layers mixed with shiny gold accents sitting atop a traditional evergreen wreath during December celebrations. Talk about holiday magic!
Loopy Tree Bows for Whimsical Decor
Those fun looped bows really bring some cheer to holiday decorations and give Christmas trees that extra touch of playfulness. What makes them special? Just look at those ribbon loops shaped like gentle branch curves creating this light-hearted vibe nobody can resist. To make one, grab some ribbon pieces all about the same length, twist them into loops, then fasten everything together using floral wire at the middle point. Want to take it up a notch? Play around with different colors for maximum effect. Bright red works great, so does green, but don't forget about shiny metallic options too they'll definitely make the tree stand out. When placing these creations on the tree, think about where the Christmas lights will fall. Put them near light clusters so those little sparkles catch on the ribbons and create that magical glow we all love during December festivities.
Rustic Charm: Burlap and Velvet Bow Ideas
Adding burlap and velvet to holiday bow designs brings that perfect mix of rustic charm and cozy comfort to winter decorations. The combination works wonders for creating bows that fit right in with farmhouse vibes or vintage style homes. When putting together these bows, try mixing burlap's rough texture with velvet's softness for something that feels both grounded and elegant. Place them anywhere from mantles to back of dining chairs, maybe even incorporate one into table centerpieces. What makes these bows special is how they instantly warm up a room while bringing back memories of simpler times. Spaces decorated this way just seem to glow with holiday spirit without going overboard on flashy details.
Tree Toppers That Steal the Show
Bows make great tree toppers because they really stand out at the top of any Christmas tree setup. Adding a bow instead of the traditional star gives holiday decorations that extra something special. People love playing around with all sorts of options when making their own bows. Some folks go big with oversized bows made from thick satin ribbons, others prefer smaller ones crafted from thinner materials. Combining textures works wonders too. Try mixing rough burlap with smooth velvet for a country look, or layer shiny metallic ribbons over matte ones for something sparkly and festive. Getting the size right matters a lot though. A bow that's too small looks lost on top of a large tree, while something too big can overwhelm everything else going on below.
Elevating Gifts with Handmade Ribbon Accents
Putting bows on wrapped gifts really adds that personal touch people love so much. A good bow just finishes off a present and makes whoever receives it feel like someone actually put time into making it look nice. Try mixing up ribbon types to change how valuable something seems. Satin ribbons give presents that fancy feel, whereas bright patterned ones make gifts seem more cheerful and fun. Picking colors matters too. Match the ribbon to whatever event it's for or what the person likes best. Gifts wrap better when they match the occasion somehow, right? That extra attention to detail shows someone cares enough to make things special rather than just tossing something in paper.
Garlands, Wreaths, and Staircase Swag Ideas
Adding bows to garlands and wreaths really brings out the holiday cheer, making those decorations stand out so much more than without them. Try putting bows somewhere nobody expects, maybe on a staircase or even along a mantel if space allows. I once saw someone attach small red bows all along the handrail of their staircase, and it totally changed how the whole hallway looked during Christmas time. When securing bows to different surfaces, most people find either floral wire works best or those little adhesive hooks from craft stores. Just make sure whatever method chosen holds fast through all the festivities. These simple additions can turn ordinary spaces into something magical when guests walk through the door.
FAQ Section
What is the best type of ribbon to use for DIY Christmas bows?
The best type of ribbon depends on the desired finish: satin for elegance, grosgrain for texture, and organza for an airy look.
Can I make bows without specialized tools?
Yes, while specialized tools can ease the process, basic tools like sharp scissors and floral wire are sufficient for making beautiful bows.
How do I prevent ribbon bows from fraying?
To prevent fraying, use sharp scissors for clean cuts and consider applying a sealant on the edges of the ribbon.
What colors should I choose for Christmas ribbon bows?
Choose colors like red, gold, green, and silver to reflect traditional holiday themes and enhance the festive spirit.