 EN

Creating beautiful christmas bows is an essential skill for anyone who wants to elevate their holiday decorations with professional-looking finishing touches. Whether you're wrapping presents, adorning your Christmas tree, or decorating your home's exterior, mastering the art of tying christmas bows with even loops and proportional tails transforms ordinary packages and displays into stunning focal points. The key to achieving perfectly balanced christmas bows lies in understanding the fundamental techniques, practicing the proper hand positioning, and selecting high-quality ribbon materials that hold their shape effectively.
The process of tying christmas bows requires patience, precision, and an understanding of how ribbon naturally behaves when manipulated. Many people struggle with creating symmetrical loops because they rush through the process or fail to maintain consistent tension throughout. This comprehensive guide will walk you through the complete method for tying christmas bows that look professionally crafted, complete with evenly sized loops, balanced proportions, and elegant flowing tails that complement any decoration style.
Selecting the Right Ribbon for Christmas Bows
Understanding Ribbon Material and Weight
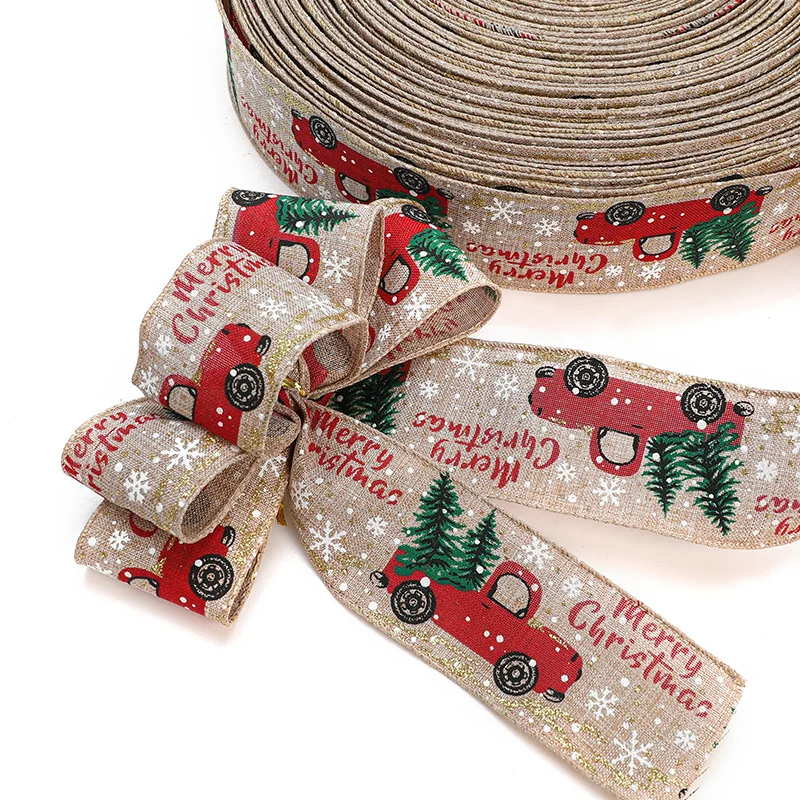
The foundation of successful christmas bows starts with choosing the right ribbon material. Different ribbon types behave differently when you tie christmas bows, affecting how well the loops hold their shape and how the tails drape. Stiffer ribbon materials like wired or burlap ribbons maintain their structure better than delicate fabrics, making them ideal for beginners learning to tie christmas bows. When selecting ribbon for your christmas bows project, consider the weight and body of the material. Heavier ribbons create more dramatic loops, while lighter materials produce delicate, flowing results.
Ribbon Width Considerations for Proportional Loops
The width of your ribbon directly impacts the appearance of your final christmas bows. Wider ribbons, typically between four to six inches, create bold, visually striking christmas bows with substantial loops that photograph well and make impressive decorative statements. Narrower ribbons work best for smaller applications and intricate designs. When tying christmas bows, the ribbon width should be proportional to the size of the object you're decorating. A good rule is that your loop size should be roughly two to three times the ribbon width, ensuring your christmas bows appear balanced and intentional rather than awkward or disproportionate.
Step-by-Step Technique for Tying Perfect Christmas Bows
Preparing Your Ribbon and Creating the First Loop
Begin your christmas bows by holding the ribbon in both hands, leaving the desired tail length on one side. The first tail of your christmas bows should be approximately eight to twelve inches, depending on your final bow size and decoration scale. Bring the ribbon up and create your first loop by folding it back on itself, holding the fold point firmly between your thumb and forefinger. This foundation loop is crucial because it determines the overall structure of your christmas bows. Maintain steady tension as you form this initial loop, ensuring the ribbon doesn't twist or crease in a way that will compromise your finished christmas bows appearance.
Creating Symmetrical Second Loop and Securing Tails
With your first loop secured, create an identical second loop on the opposite side, making sure both loops of your christmas bows match in size and position. This symmetry is what separates amateur attempts from professional-looking christmas bows. Cross the ribbon over the center point and fold it back to create the second loop, maintaining the same loop size as your first one. Once you have both loops formed, bring the remaining ribbon down to create the second tail of your christmas bows, positioning it so it mirrors the length and angle of the first tail. Hold everything securely at the center point while you adjust and fluff each loop to achieve the perfectly balanced christmas bows you're aiming for.
Cinching and Finishing Your Christmas Bows
The final step in creating polished christmas bows involves wrapping a separate piece of ribbon, wire, or elastic band around the center point where all the loops and tails meet. This cinching action holds your entire christmas bows structure in place and creates a clean, finished appearance at the center. Pull this wrapping material tightly enough to compress the layers without distorting the loop shapes you've worked to create. For the most elegant christmas bows, hide this center wrapping beneath one of the tails or use a coordinating ribbon that blends seamlessly. Once cinched, gently fluff and adjust each loop of your christmas bows to ensure they're standing out evenly and the tails are draping with graceful proportionality.
Troubleshooting and Achieving Professional Results with Christmas Bows
Fixing Uneven Loops in Your Christmas Bows
If your christmas bows loops appear uneven despite your careful work, the issue typically stems from inconsistent ribbon tension during the folding process. Uneven loops in christmas bows can be corrected by carefully adjusting each loop's size before cinching. Gently pull or push each loop to match its counterpart, working slowly to avoid creasing the ribbon. When loops in your christmas bows are significantly different sizes, you may need to start over, as repairing major asymmetry often looks obvious. Practice makes this adjustment automatic, and experienced makers of christmas bows can quickly identify and prevent loop size discrepancies as they tie the bow rather than correcting them afterward.
Balancing Tail Length and Creating Visual Harmony
Professional-looking christmas bows feature tails that are proportionally balanced to the loops and to each other. Both tails of your christmas bows should ideally match in length, creating visual symmetry that enhances your overall decoration aesthetic. Unequal tails in christmas bows suggest either careless execution or intentional design, so decide which approach aligns with your desired style. To achieve perfectly balanced christmas bows tails, measure your first tail carefully, then replicate that length precisely when creating the second tail. Experiment with different tail lengths for various applications, as christmas bows on smaller gifts may benefit from shorter tails, while larger decorative bows can accommodate longer, more dramatic tail presentations.
Enhancing Shape and Volume in Christmas Bows
After cinching your christmas bows, take time to deliberately shape and fluff each element. Gently pull each loop outward and slightly upward to create depth and dimension in your christmas bows. This fluffing action transforms flat, compressed loops into full, three-dimensional elements that photograph beautifully and look substantially more professional than unfluffed christmas bows. If certain loops refuse to maintain their shape, try curling the ribbon edges slightly using your fingers or a scissors blade to encourage them to hold their position. Storage and handling also affect the longevity of your christmas bows shape, so store finished bows in a cool, flat space rather than crushed in boxes where they'll lose their carefully crafted dimension.
FAQ
What ribbon width is best for learning to tie christmas bows?
For beginners learning to tie christmas bows, a ribbon width of four to five inches provides an excellent balance between manageability and visibility. This width allows you to see exactly what you're doing while working with material substantial enough to hold its shape reasonably well. Wired ribbon or burlap ribbons in this width are particularly forgiving when learning to tie christmas bows, as they maintain loop structure even if your initial attempts aren't perfectly precise. Start with these more forgiving materials before graduating to delicate silks or satins for your christmas bows projects.
How can I make my christmas bows look fuller and more professional?
Making fuller christmas bows involves both selecting appropriate ribbon materials and mastering the fluffing technique after tying. Use wired ribbon or stiff materials specifically designed for decorative bows when creating christmas bows, as these maintain volume much better than soft fabrics. After cinching your christmas bows, spend extra time gently pulling and shaping each loop outward, creating a three-dimensional appearance rather than a flat bow. Layer multiple ribbons or add complementary ribbon textures to your christmas bows for even more visual impact and sophistication in your final design.
Should the loops and tails of christmas bows be the same length?
The tails of your christmas bows should typically match each other in length, but they don't necessarily need to match the loop length. Professional christmas bows generally feature tails that are slightly longer than the loop diameter, creating elegant proportions and visual balance. Experiment with different tail-to-loop ratios when creating your christmas bows to discover your preferred aesthetic. Longer tails work beautifully on larger decorative christmas bows, while smaller gift bows benefit from more restrained tail lengths that don't overwhelm the presentation.